
Intro
Whether you are a blogger or an indie developer, having a professional email address with your own domain is super important. However, since most individuals don’t send a ton of emails, a free service is the best way to start. Today, we’ll use Cloudflare Email Routing to handle incoming mail, and Resend + Gmail to handle the outgoing side.
Cloudflare Email Routing (Receiving)
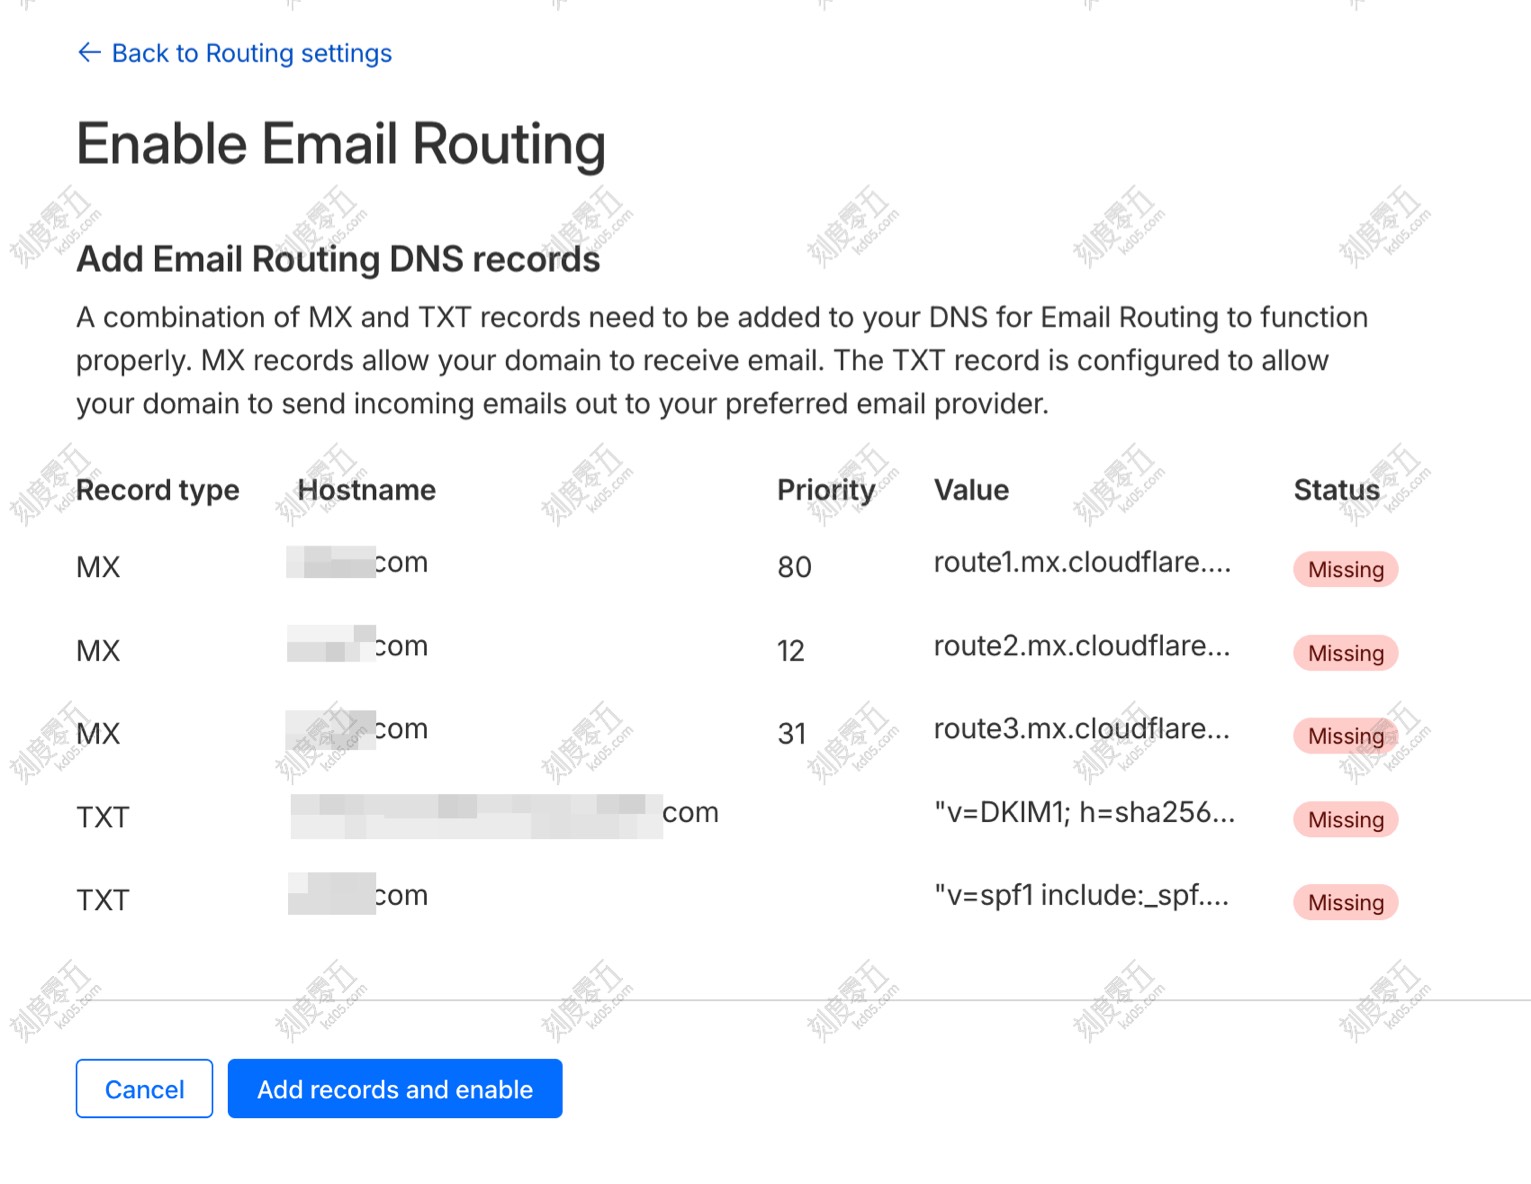
Set up DNS
To use Cloudflare’s email routing, your domain’s Nameservers (NS) must be pointed to Cloudflare. Once your domain is added to Cloudflare, go to the domain dashboard and find Email -> Email Routing. It will walk you through setting up the necessary DNS records automatically.
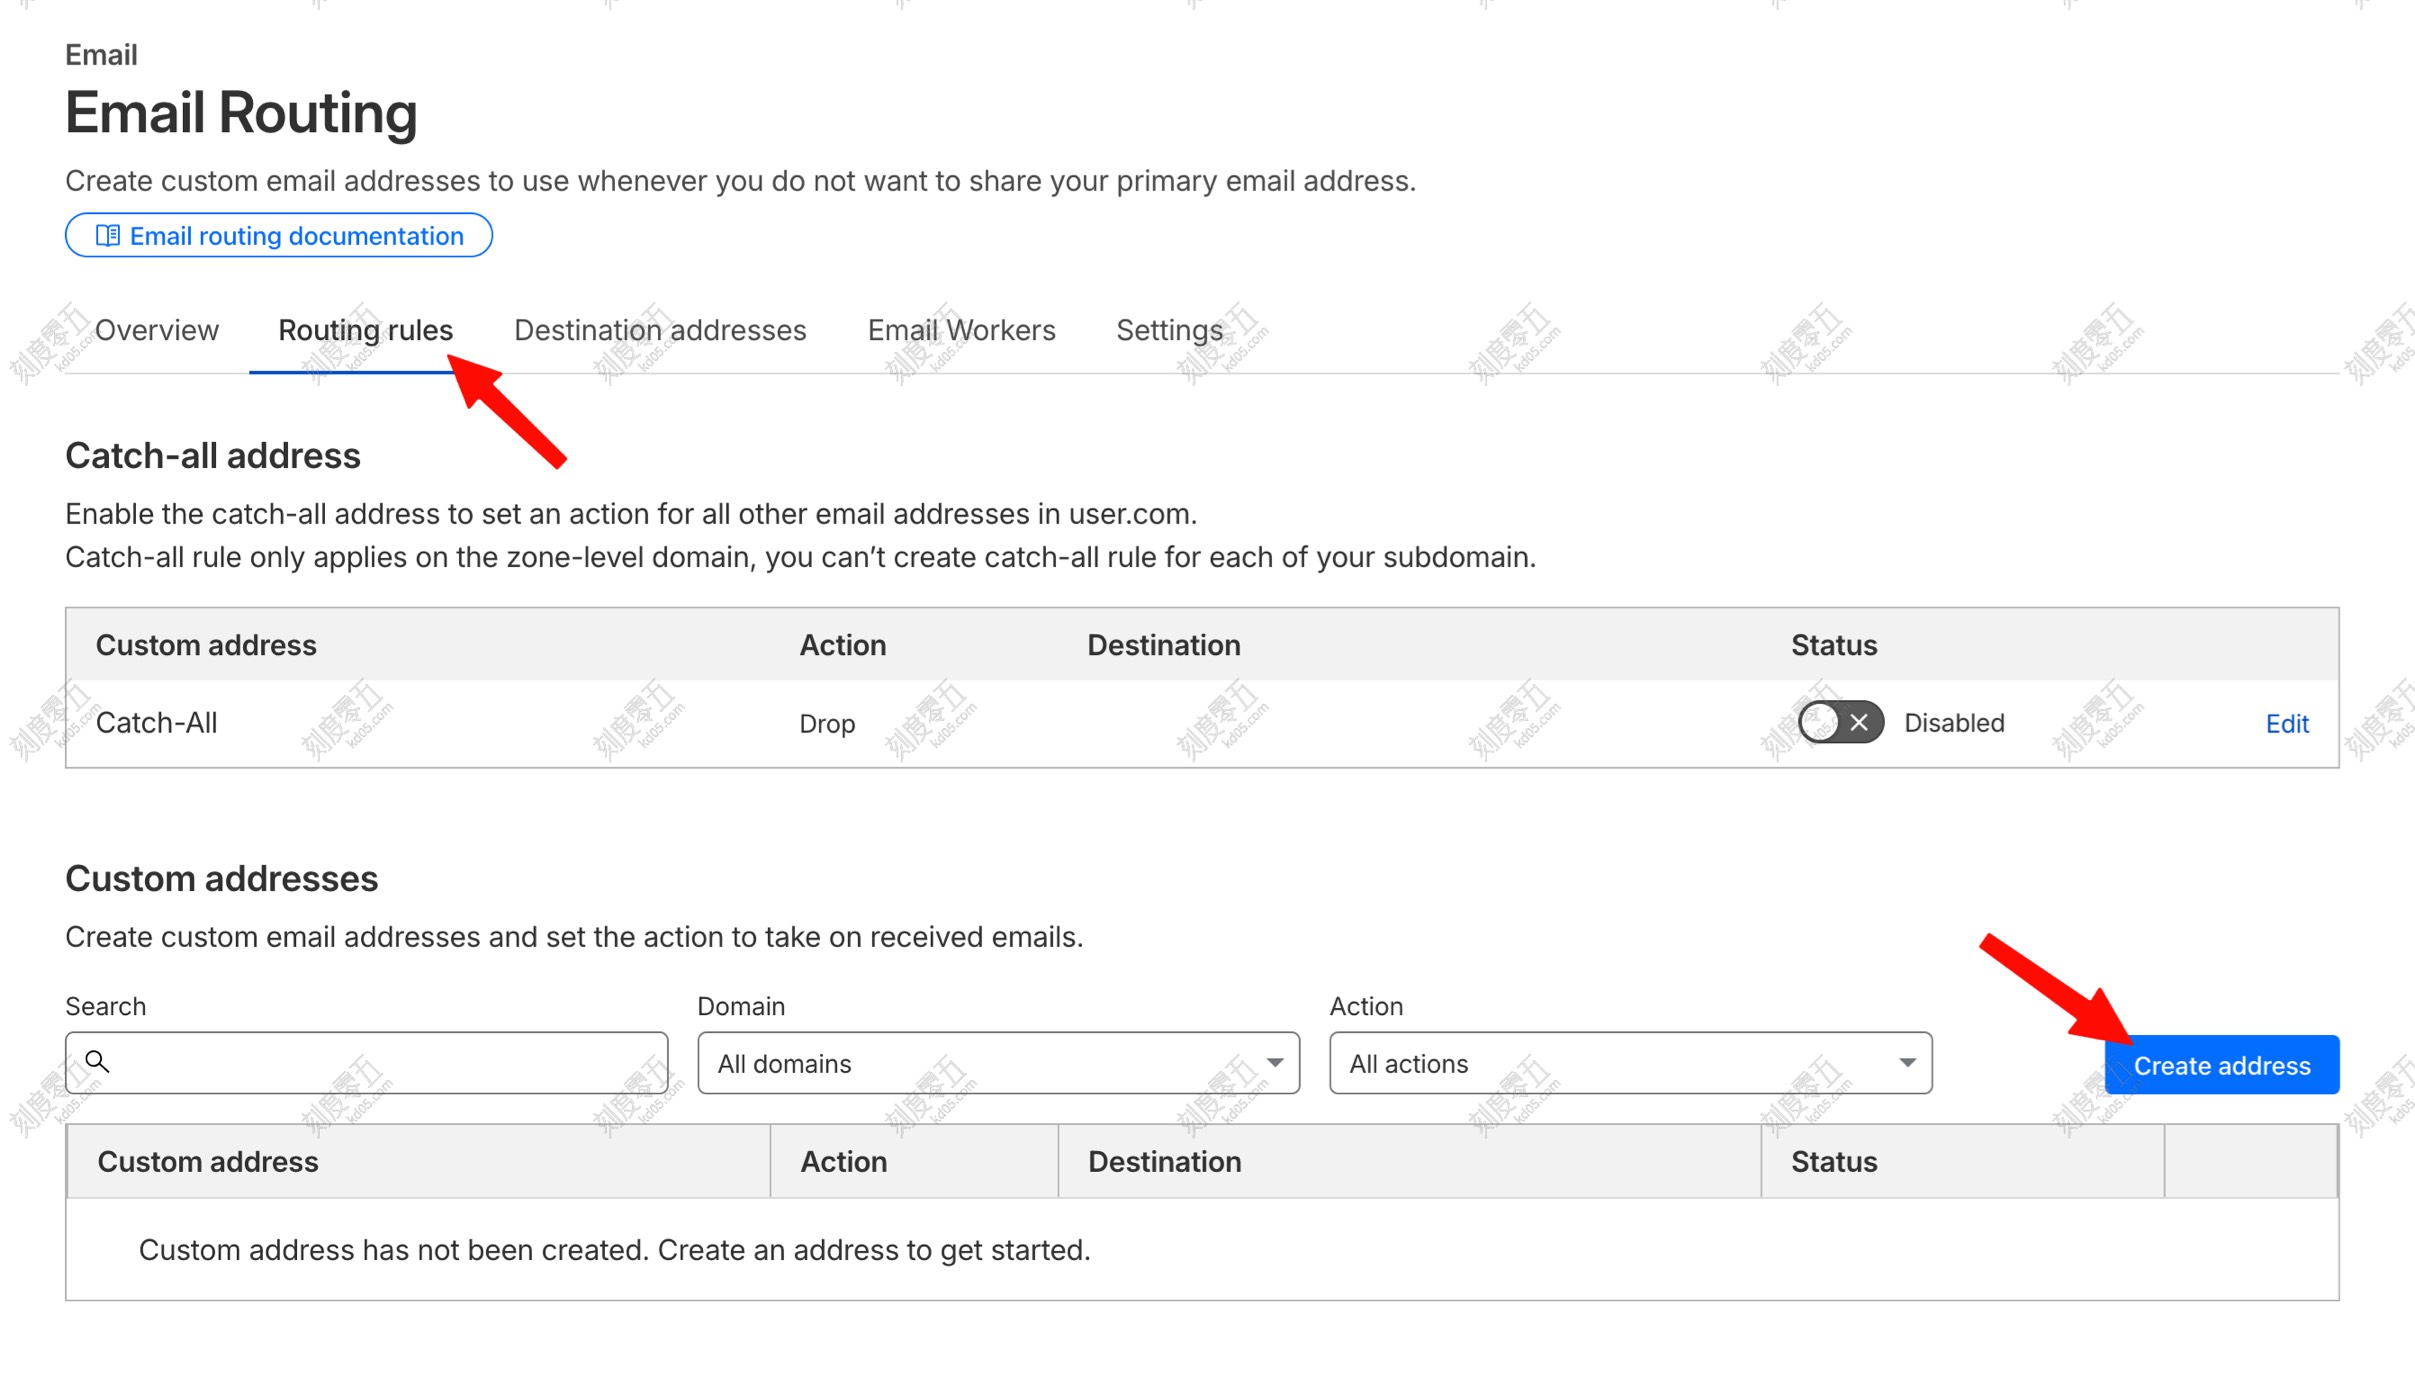
Set up Routing Rules
Go to Routing Rules -> Create address to set up your custom email address.
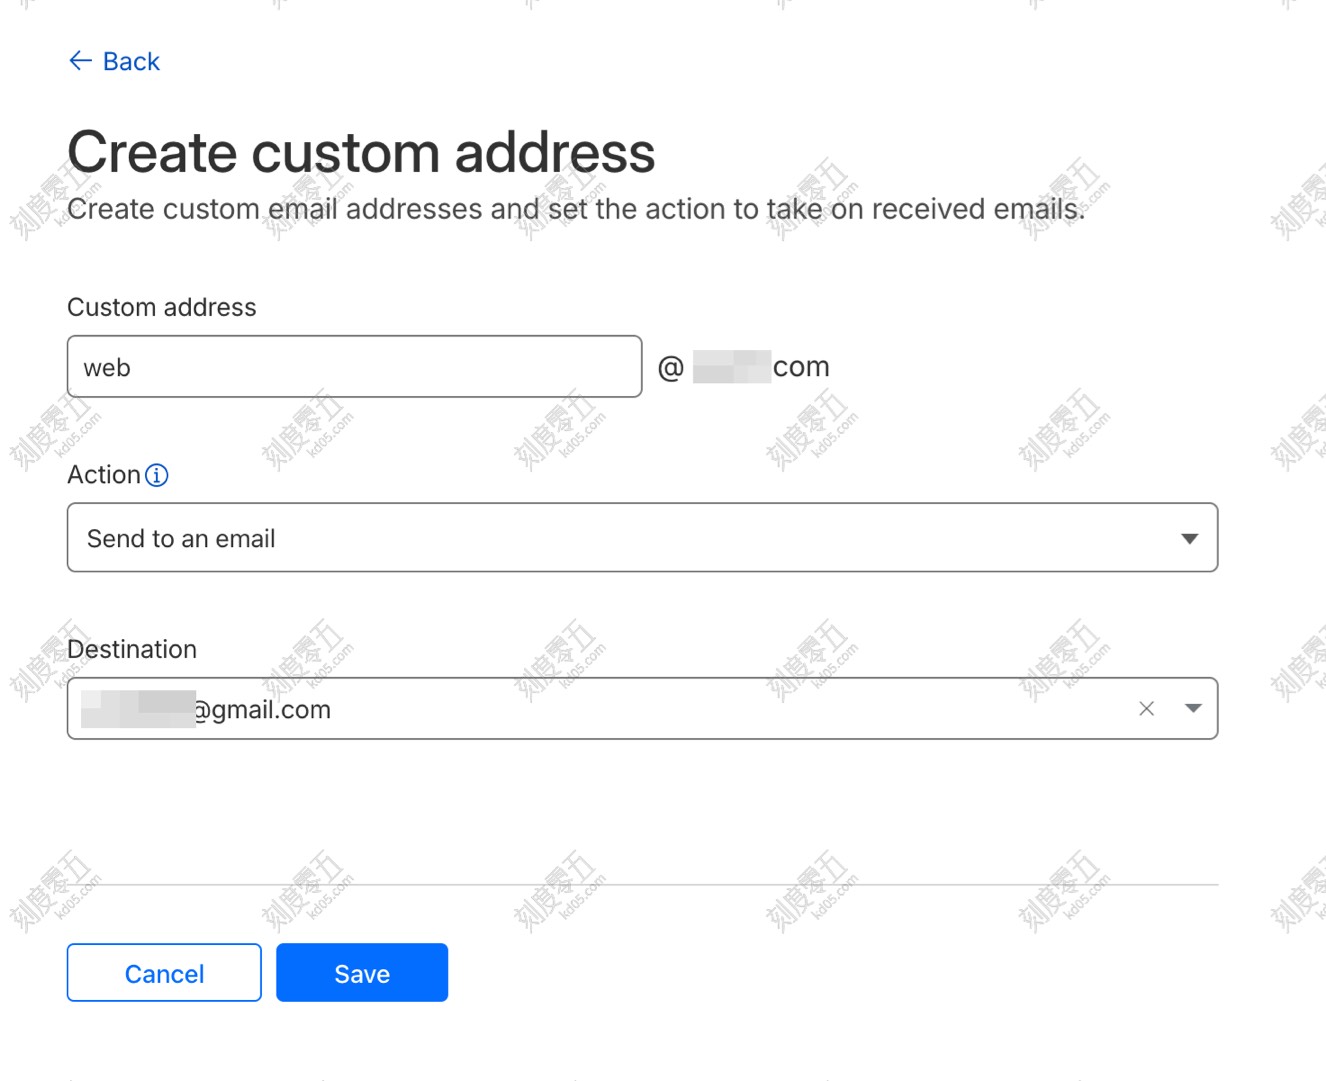
For example, you can set it to [email protected] and have it forward to your personal Gmail address, like [email protected]. Set the action to Send to email. If this is your first time using that Gmail address here, Cloudflare will send a verification email. Just open your Gmail and click the link to confirm.
And that’s it for receiving! It’s very straightforward. You can try sending a test email to your new custom address to make sure it shows up in your Gmail inbox.
Set up Resend + Gmail (Sending)
Resend offers 3,000 free emails per month, which is more than enough for most bloggers and indie devs.
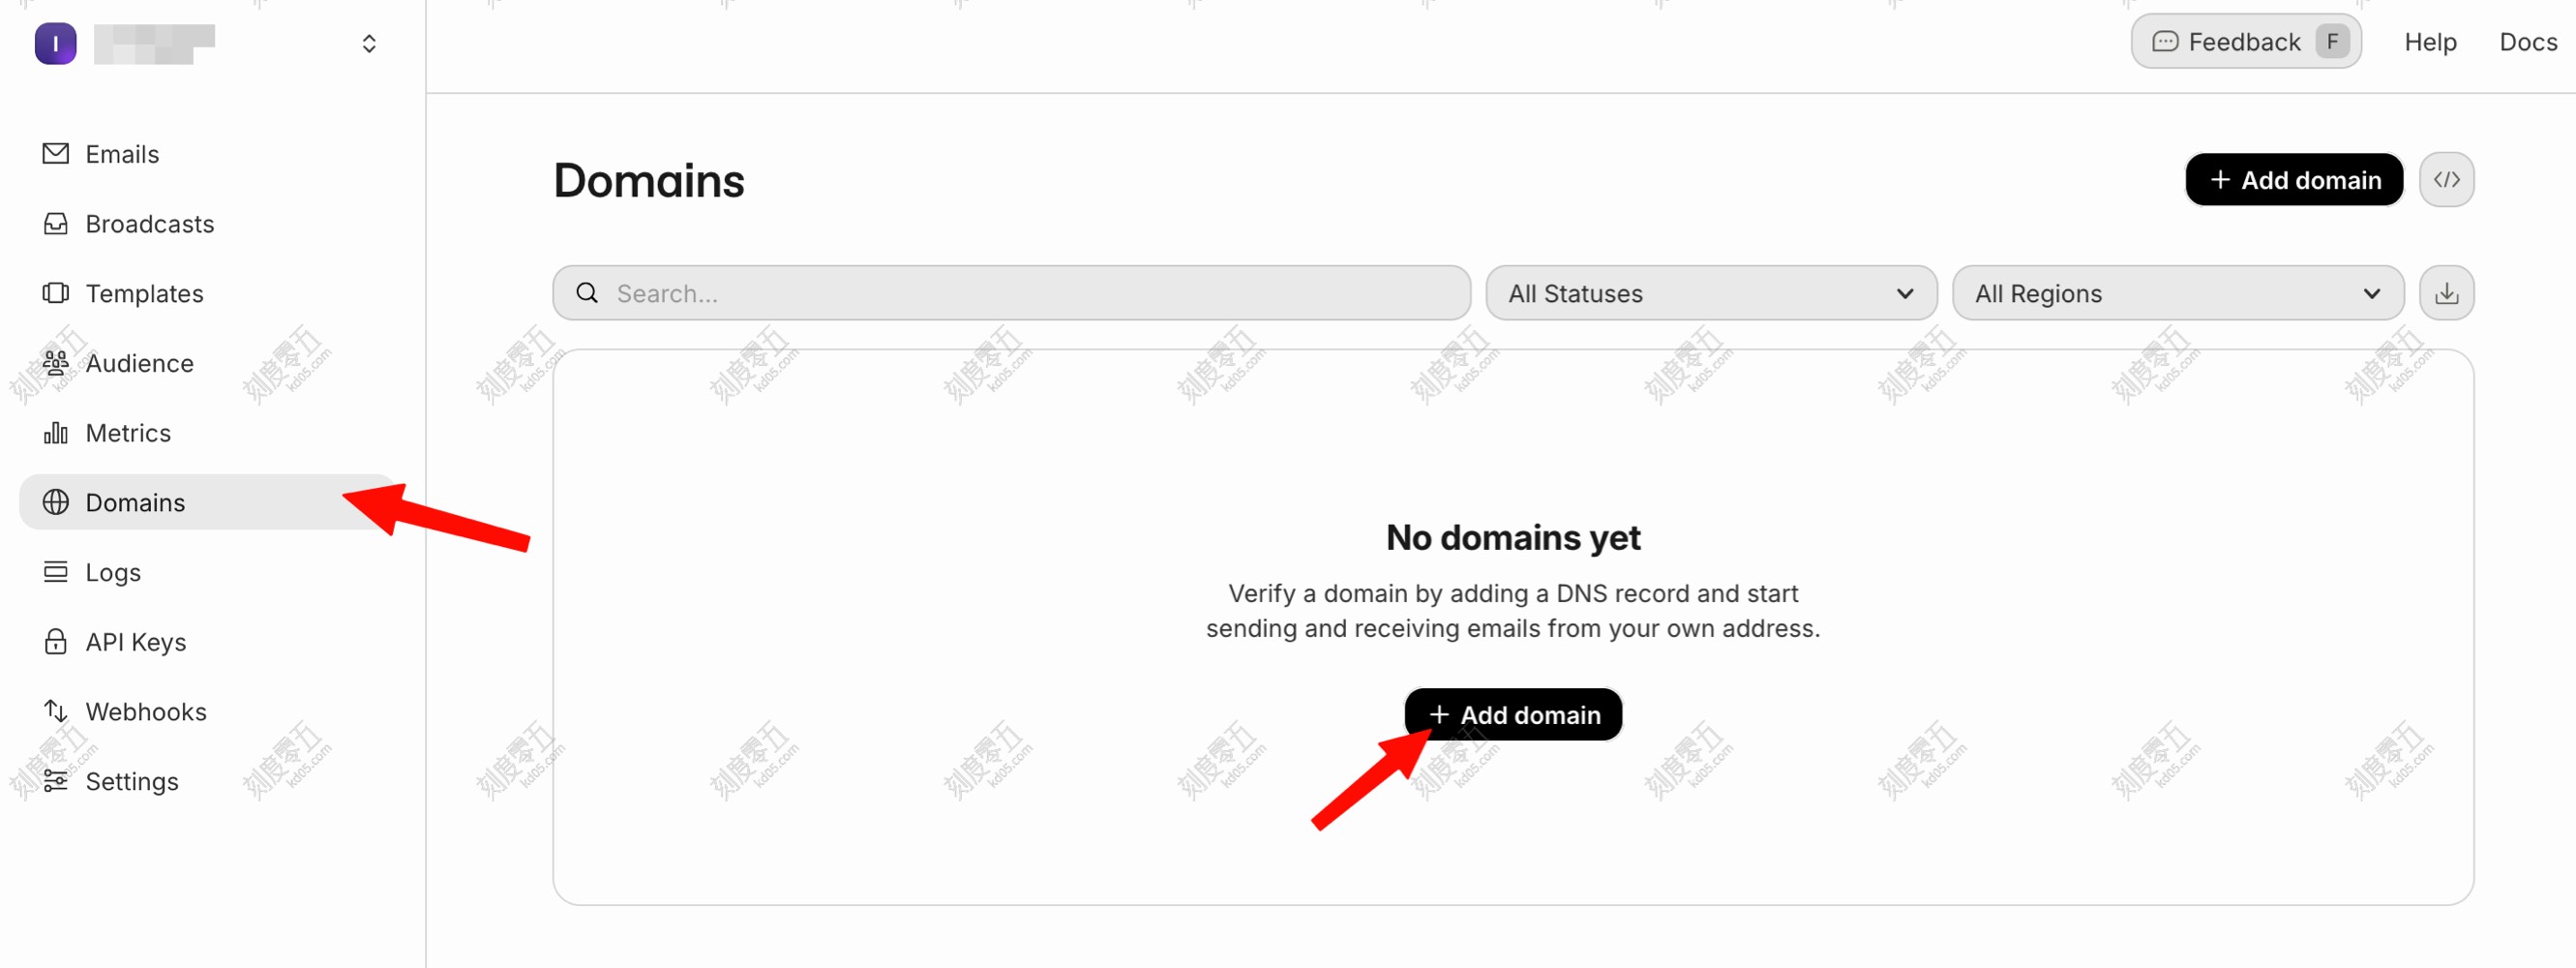
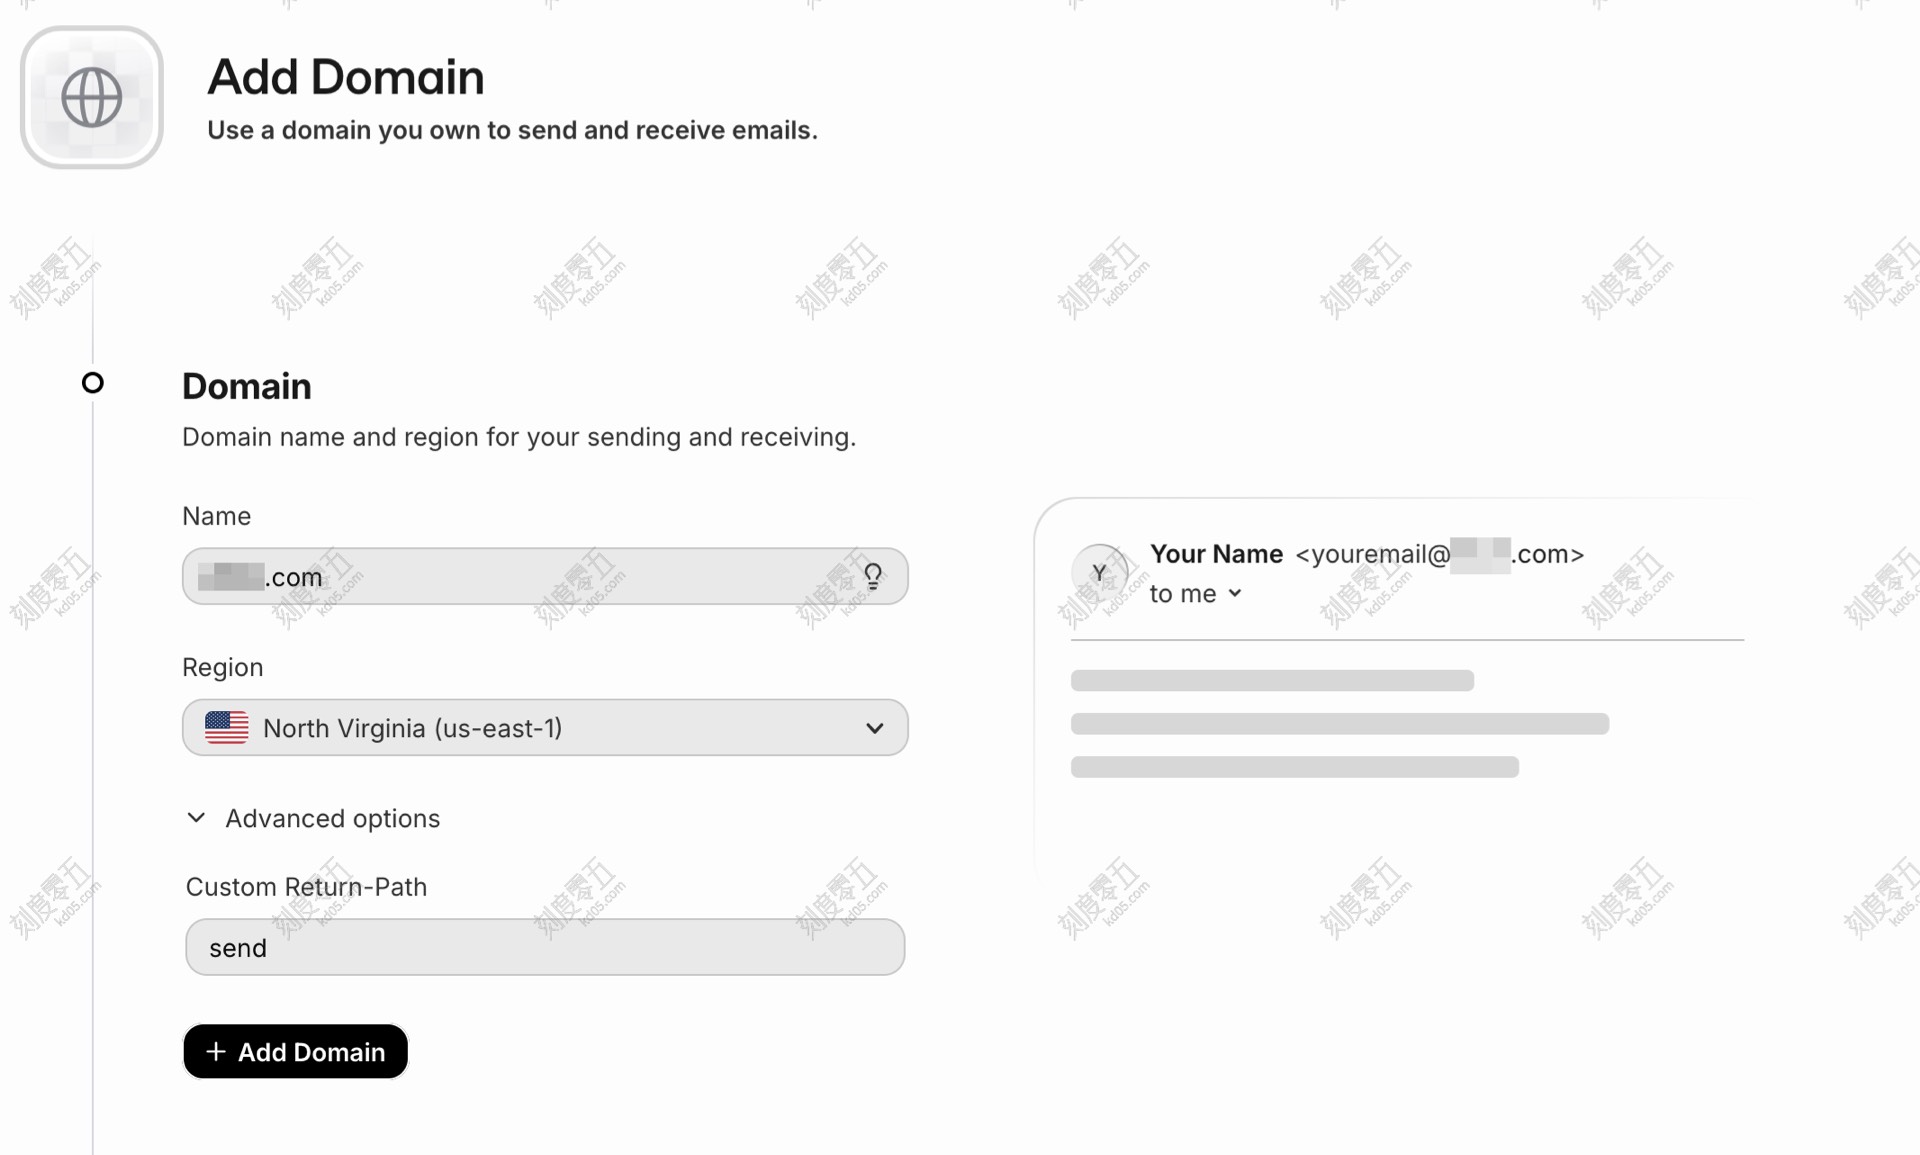
Add Domain in Resend
Click Domains on the left sidebar, then Add domain.
Enter your domain name (e.g., abc.com) in the Name field and keep the rest as default.
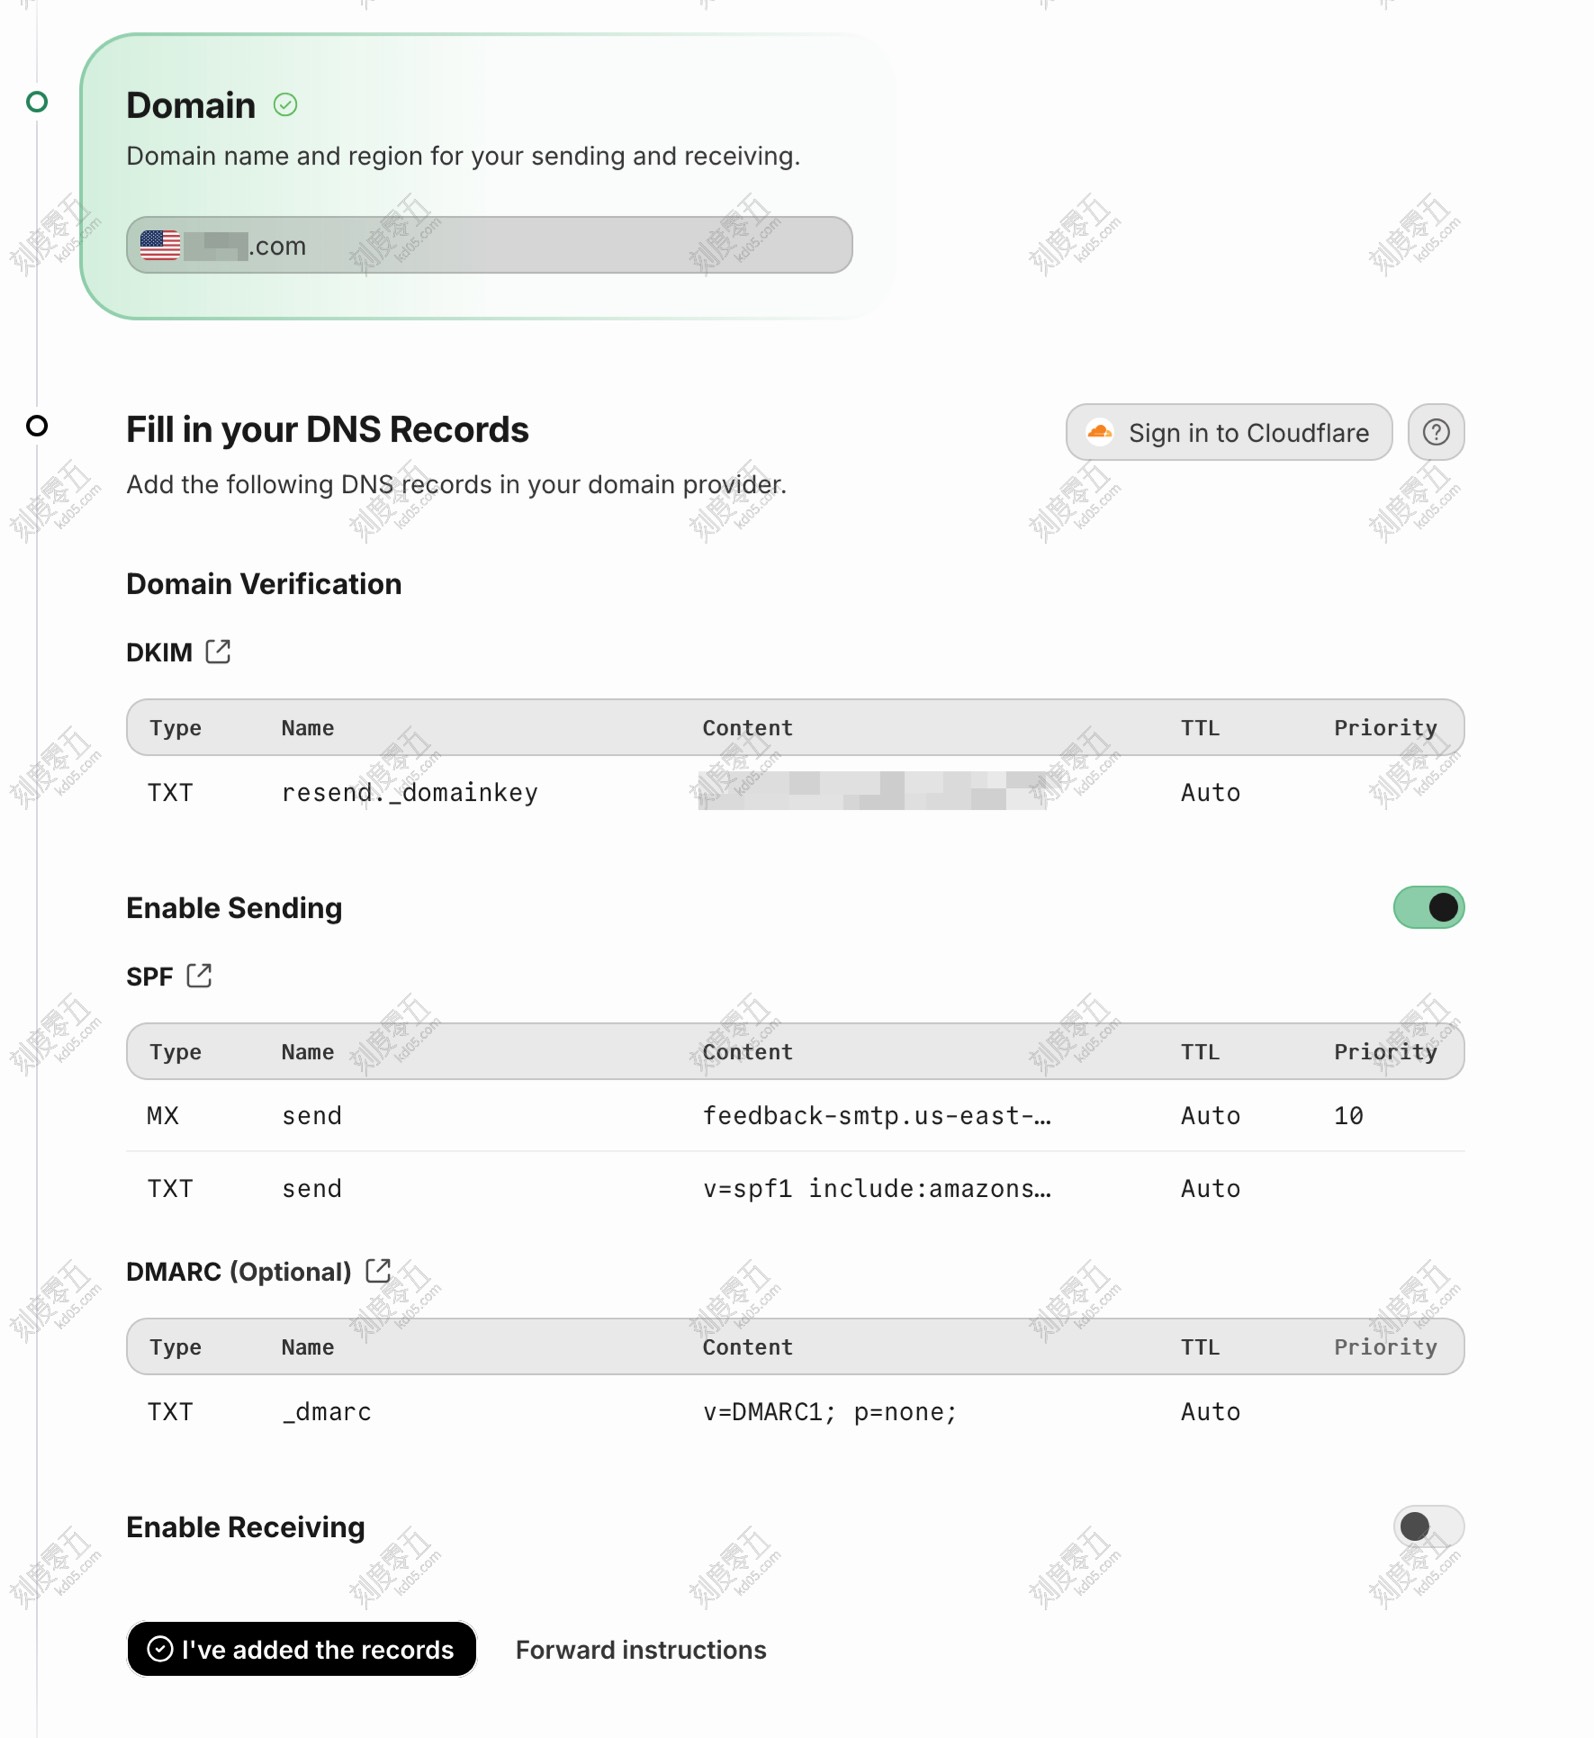
Configure Resend DNS
Since our DNS is managed by Cloudflare, this part is easy. Just click Sign in to Cloudflare, and it will handle the DNS setup for you automatically.
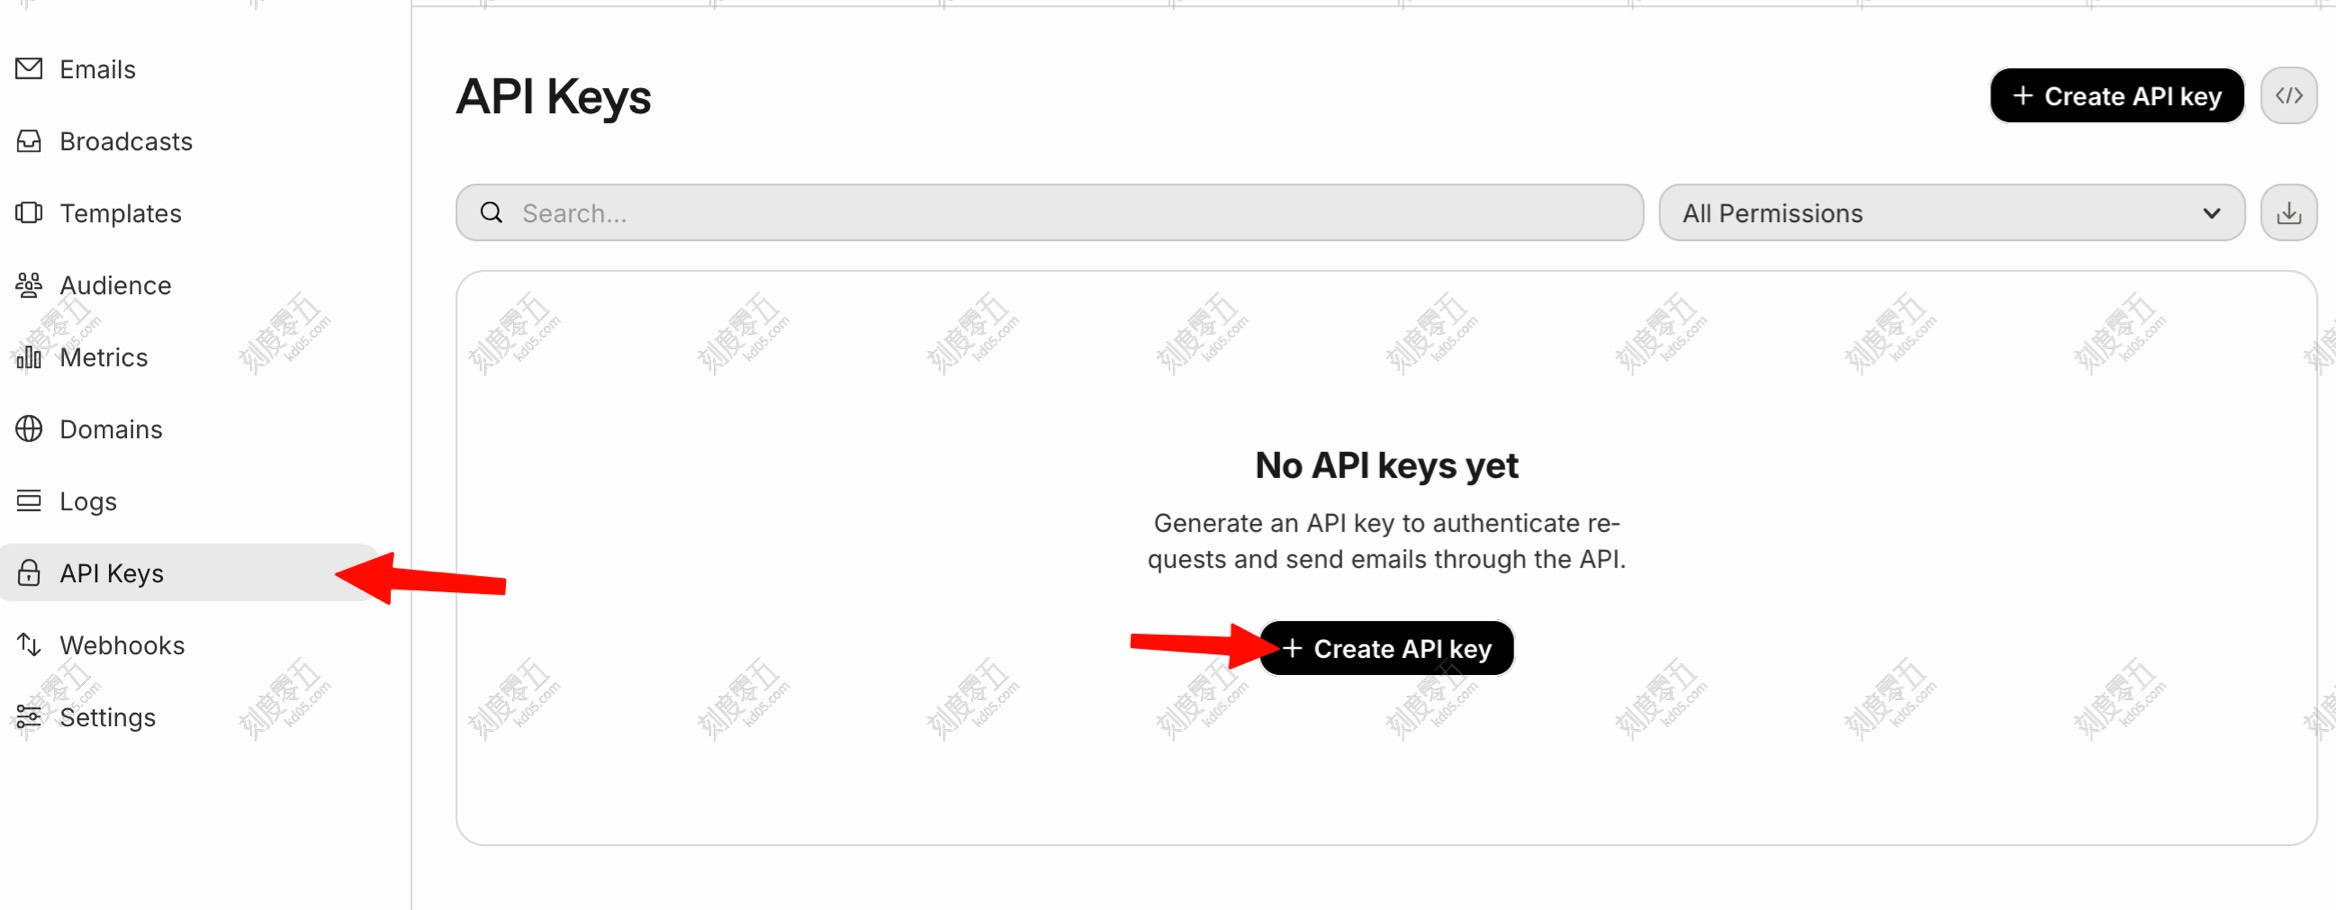
Create an API Key
We’ll be using Gmail to send emails through Resend via SMTP, so we need a Resend API key. Go to API Keys -> Create API key.
Configure it based on your needs. For Permission, you can pick Full access or Sending access. Make sure to select your domain.
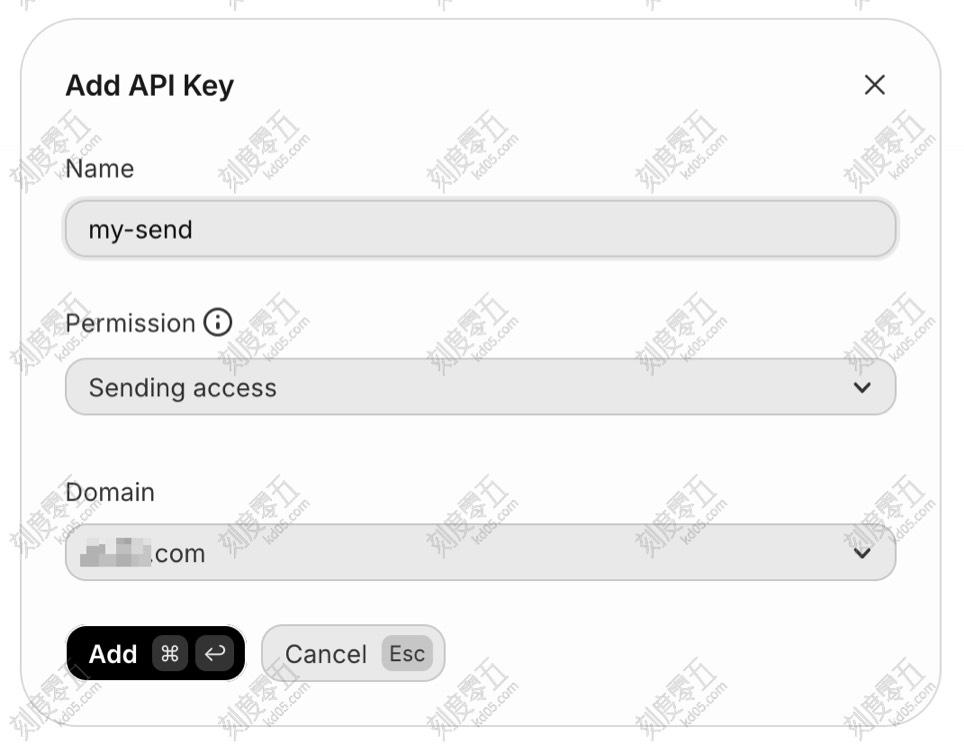
After clicking Add, a Token will pop up. Copy that long string starting with re_xxxxxxxxx right away—it only shows up once!
Now, the Resend side is all set.
Set up Gmail
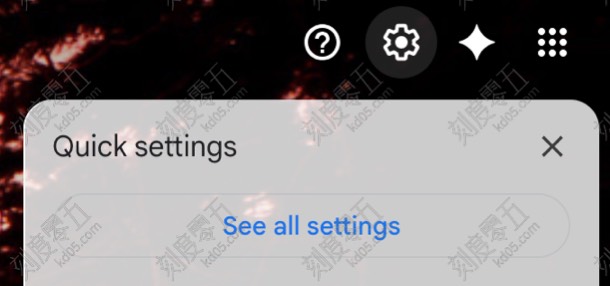
Open the Gmail account you used for Cloudflare routing. Click the Gear icon in the top right and select See all settings.
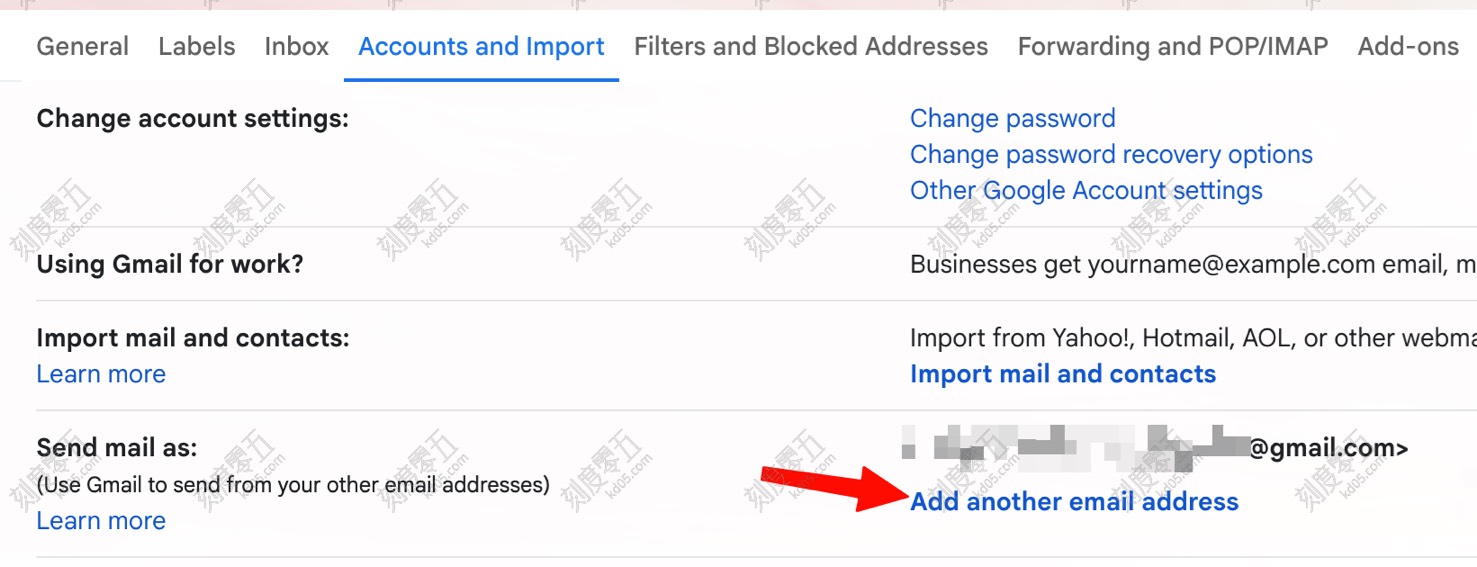
Go to Accounts and Import -> Send mail as -> Add another email address.
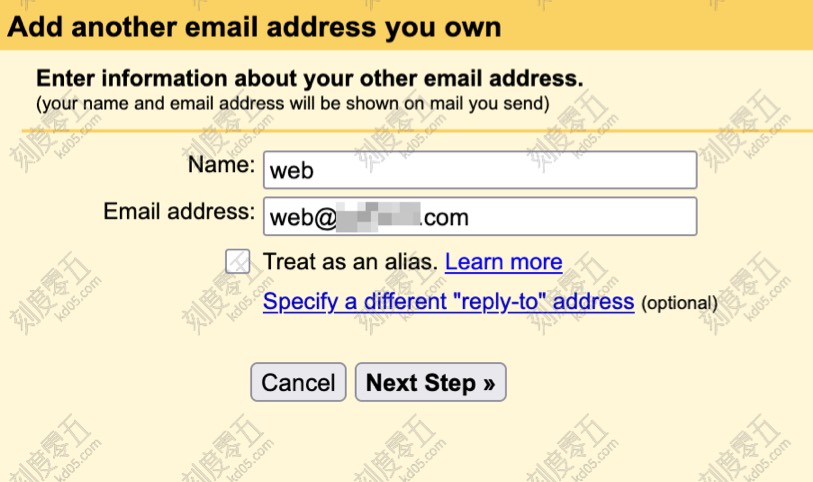
The Name is what people will see when they get your mail. The Email address should be the custom domain address you set up in Cloudflare. Uncheck Treat as an alias.
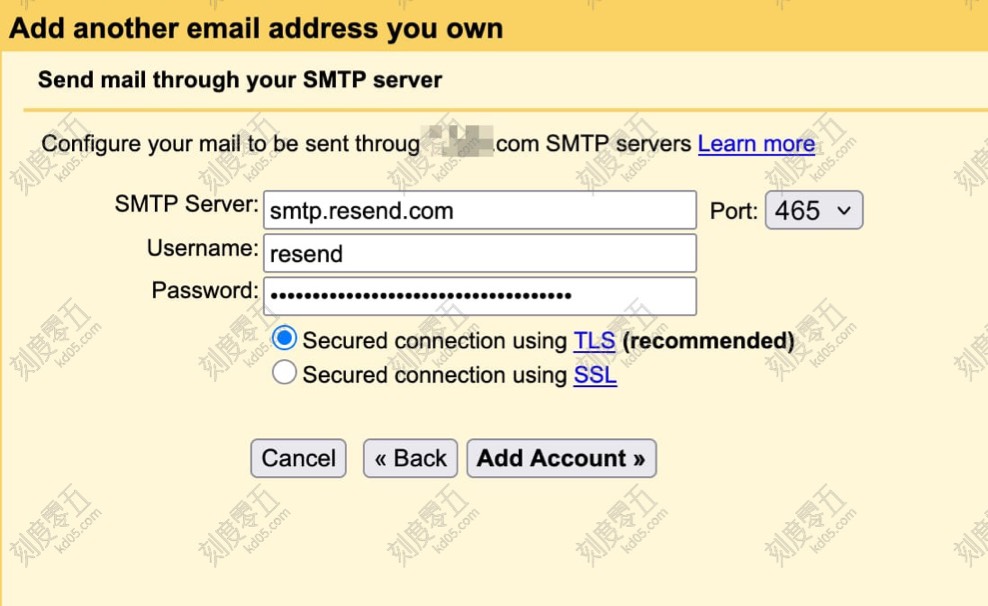
Set the SMTP Server to smtp.resend.com. The Username is resend, and the Password is the API Token (re_xxxxx) you just created. Set the Port to 465 (other ports might fail depending on your setup). Leave everything else as default.
That’s it! Gmail is ready. Now, when you compose a new email, you can click the “From” field and switch to your custom domain address.